Feeds:
Posts
Comments

Posts Tagged ‘vtt’

I have been thinking to get a POV (Point Of View) camera for my bike. While browsing on the net I found several posts indicating various DIY solutions for a camera mount for bikes. I decided to give ot a try just before spending money on a “professional” solution.

The KIT

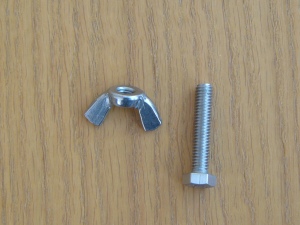
The kit (big laughs) comprises of  a taillight ring (not shown gere but it is a standard Cateye ring), a screw and a butterfly. The cost was very low… so low that i cannot remember.

The Kit I used my normal camera which is a Lumix DMC – FZ8  and it was mounted on the handlebar of my full suspension mountain bike which is a Yeti 575.
The Output

I shot several videos and I will post the most representative examples of the output of this project.

.

.

.

The first example displays the outcome of riding on the road.

The second example displays the outcome of riding gravel and dirt.

The third example displays the outcome of riding a lakeside singletrack.

As you see the output is poor and there are two annoying features in all shots.

  • The mount on the handlebar is not ideal. As I adjust the course of the bike while riding, the shot moves along . We should have in mind also that this bike has a short stem (50mm) which increases the steering input to the shot.
  • A lot of vibration is transfered to the shot, due to the fact that the cameras contact poit is a long screw, which does not absorbes any of the riding vibration

So, I am calling this experiment / project a failure. Stay tunes as I will present the specs and examples of all POV cameras during my selection process. Abiento!

Read Full Post »

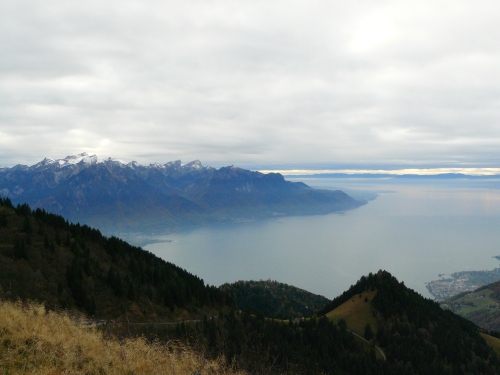
View of Lac Lemans at the base of Dent de Jaman

View of Lac Lemans at the base of Dent de Jaman

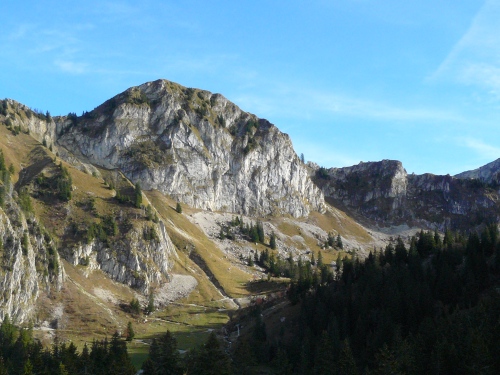
On Saturday, went to the Col de Jamal. The weather was cool and wonderful, so we jumped the opportunity of touring the Dent de Jaman and grab the astonishing views.

Access: there are two ways to visit Col de Jaman (which overlooks Montreux).

  • By Car: Exit the highway at the Montreux exit, and then follow the direction towards Les Avants. After that follow the signs for the Col de Jaman. It is roughly 11.5 km from Montreux. Be careful because the road after Les Avents is thin and steep at some sections. So be prepared to give way to descending cars. I do not believe that this road is easy to drive in winter and early spring (except 4×4 cars). You can park at the available free parking lot, but beware; if it is Sunday and the weather is good then there is a good chance that the place will be overcrowded. So… the earlier the better.
  • By Train: From the Montreux station you can get the train Montreux – Rochers de Naye (http://www.sbb.ch/en/) for info and fares) to Jaman (45 mins). By this you will arrive at the station which is near the base of the Dent de Jaman, in the middle of the hike.
  • By Bike: For the daring ones… follow the car itinerary by bike. I have seen a lot of people doing it but it is quite an uphill. Otherwise you can take the train to Jaman, arrive at the Buvette de Jaman (nice little chalet), and ride towards the beginning of the route.  The beginning of  route is signposted and easy to follow after

The Route: The route begins at the entrance of the parking lot of right after a small restaurant called “le Manoire”.  You see a building (having the restaurant on your left shoulder) and you head around it. The path tat the beginning is more of a dirt road. You follow that dirt road, passing through a woody area. Soon, you turn right and you see the path following a “snake” uphill pattern (see photo). The path is sporadically signposted with yellow singes (mainly at the turns).

The "Snake" looking trail at the Base of the rock formation

You begin the ascent that will eventually bring you to the base of the Dent de Jaman. Following this route you will pass under the cables of a ski lift. Continue uphill and the next landmark is the Cabane de Lhautaudon on your right. On your left you can see the Dent de Hautaudon (1871 m).  After a while you ‘ll find the “Chalet Mont. d’Amont” (1651 m).  Forward and left you can now see the Rochers de Naye (2042 m). At this point, if you are lucky you could see group of mountaineers climbing the Dent de Hautaudon. You continue uphill and you reach a point where the route turns right, towards to the Gare de Jaman and the final section of the uphill. At this spot there is a sign that refers to the local Via Ferrata. Info for the ferratisas here (in French only).  So continue to the left of the sign, walking on a dirt road. At the end of it you will reach the Jaman train station. Pass the railway rails and you will find the lovely “Buvette de Jaman”. If you want you can stop here for a cup of coffee or a small  snack. The view is very nice an the proprietors are very friendly. Continue to the left to reach the base of the Dent de Jaman. Photos are necessary here!!! The base of the dent has a panoramic view of the lake Lemans as well as the the small valley that you just crossed.  Up to here you should have walked up to 1h or 1 1/4 h.

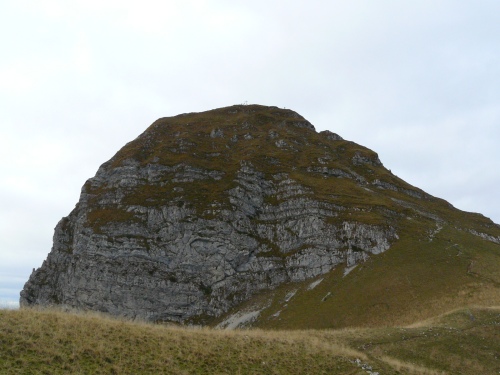
Dent de Jaman (1875m)

Dent de Jaman (1875m)

As we are describing the tour of this dent, we continue to the right (right shoulder to the Dent peak). We pass a small iron door, and we begin a decent – traverse for about 500m in a small path having the dent on our back. Caution! If previous days were rainy then the path here could be slipery, due to mud accumulation in the soles of the shoes. There is alot of vegetation on the slope so a fall should not be dangerous, but be cautious. After all we do this for fun!  At the end of the traverse you find a yellow sign indicating that that in order to return to the Col de Jaman you need to turn right and follow a broad path (road).  You should have the dent on your right. You should reach the Col de Jaman in about 40 minutes, while enjoying the views of the Lac Lemans.

Total hike time: About 2 – 2.5h depending on your physical condition and your mood!!! I often walk below my top pace in order to enjoy the views, feel the nature and take pictures. But this is not always advisable, particullary to long and/or demanding routes.

Mountain Biking: This is a nice place to ride your mountain bike. I do not recommend the full tour, as you will have to carry your mountain bike for the 500m traverse that starts at the base of the Dent.  You can start at the Col de Jaman and ride to the Buvette de Jaman and back, or you could go by train and downhill towards the Col. Around the Col there are a lot of riding places for you to explore. I would categorize these rides under the Cross Country rides and I believe that a hard tail mtb will be sufficient. I will write another post when I ride the area… so until then… a prochaine!

Read Full Post »

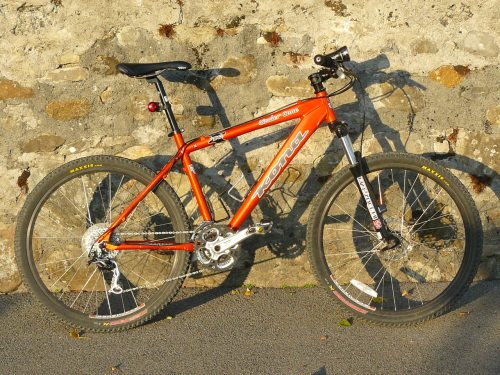
2007 Orange Cinder ConeIn the first two posts, in biking category, I will introduce my bikes.

In chronological order this bike was bought in September 2007.

The Cinder Cone is my XC (Cross-country) bike, and in general the work horse of my roster. Apart from mountain endeavors, the Cinder Cone accompanies me in most of my weekly training and in city missions….. such as the beloved to all of us…. supermarket (FUNtastic).

With this bike I rediscovered biking after an absence of many many years. This bike followed me to my first “new era” epic ride. It was a 45km ride around Kantili mountain (Evia / Greece).

Finally (….it happened to me), with this bike I was seasoned to XC mountain biking  and discovered my needs for something more playful (i.e a full suspension machine for Trail and All Mountain riding).

Bike Specks

Frame tubing: Kona All-Mountain Butted Aluminum

Fork: Marzocchi MZ Race – 100mm Travel, lockout

Headset: TH

Crankarms: FSA Alpha Drive Powerdrive

Chainrings: 44/32/22

Bottom Bracket: FSA Powerdrive

Pedals: Wellgo LU-A9 w/Toe clips and straps

Chain: Shimano CN-HG53

Freewheel: Shimano Deore (11-32t, 9speed)

Front Derailleur: Shimano Deore

Rear Derailleur: Shimano Deore LX

Shifters: Shimano Deore

Handlebar: Kona Riser

Stem: Kona Control

Grips: Kona Mooseknuckle

Brakes: Hayes Hydraulic Sole

Brake Levers: Hayes Sole

Front hub: King Kong KDF2S

Rear hub: Shimano FH-M475 disc

Spokes: Stainless 14g fr/14g rr

Tires: Maxxis IGNITOR 26×2.1

Rims: Sun Black Eye

Saddle: WTB Pure V SPORT

Seat post: Kona Thumb

Seat clamp: Kona QR

Full Specs and Geometry in Kona UK website

Upgrades to the original spec

As a first ride the Cinder Cone was nice. However, as I was pushing my riding to more aggressive levels I needed to do something about cockpit rigidityand transmission rigidity and swiftness. The road to upgrade the bike was inevitable. Below the components of the upgrade.

Upgraded Components

Saddle: Selle Italia Flite (actually the original was terribly bent in a minor accident)

Handlebars: Race Face Atlas AM Riser

Stem: Thomson Elite X4

Crankset: Shimano XT

Rear Derailleur: Shimano XT

Cassette: Shimano XT

Chain: Shimano XT

Pedals: DMR V12 Magnesium

After the upgrade I experienced the following:

  • a significant boost on my riding efficiency, coming from the rigid cockpit (especially when riding uphill while placing my weight over the handlebrs)
  • increased maneuverability due to the faster transmission system

Future Upgrades

  • Fork …as I am on the heavy side (poor MZ … it had it with me)
  • Brakes …as Hays Sole hasn’t a descent stooping power and needs constant adjustment
  • Wheel set… actually this is not 100% necessary because the performance of the stock wheels are somewhat acceptable. But if you change all the above then you need to change the wheels as well in order for all the bike parts to be aligned in terms of quality and performance capacity

What I like About this bike?

  • The Frame… Very Very Much. Geometry is fantastic an allows you to ride passively and aggressively, either uphill or down hill. It is not the stiffest frame in the rear triangle ….above average thought. The frame is very reinforced at the front and in the bottom bracket area ( 5 points for KONA) allowing for serious abuse. Kona characterizes this frame as Backcountry / All Mountain, and I believe that they mean what they say. In discussing with various riders and dealers they all converge to the opinion that Kona makes their frame a bit tougher than they state.
  • Price to quality ratio for the market proposition is very good. OK it is not a racer’s bike but is a very good all rounder, making it perfect for a first MTB or covering the XC place in your roster.

Path Rider’s Thesis: Recommended – 4 Star bike (performance above expectations).

Read Full Post »